
b. Disassembly.
6-18. Copyboard Carriage Disassembly
a. Removal.
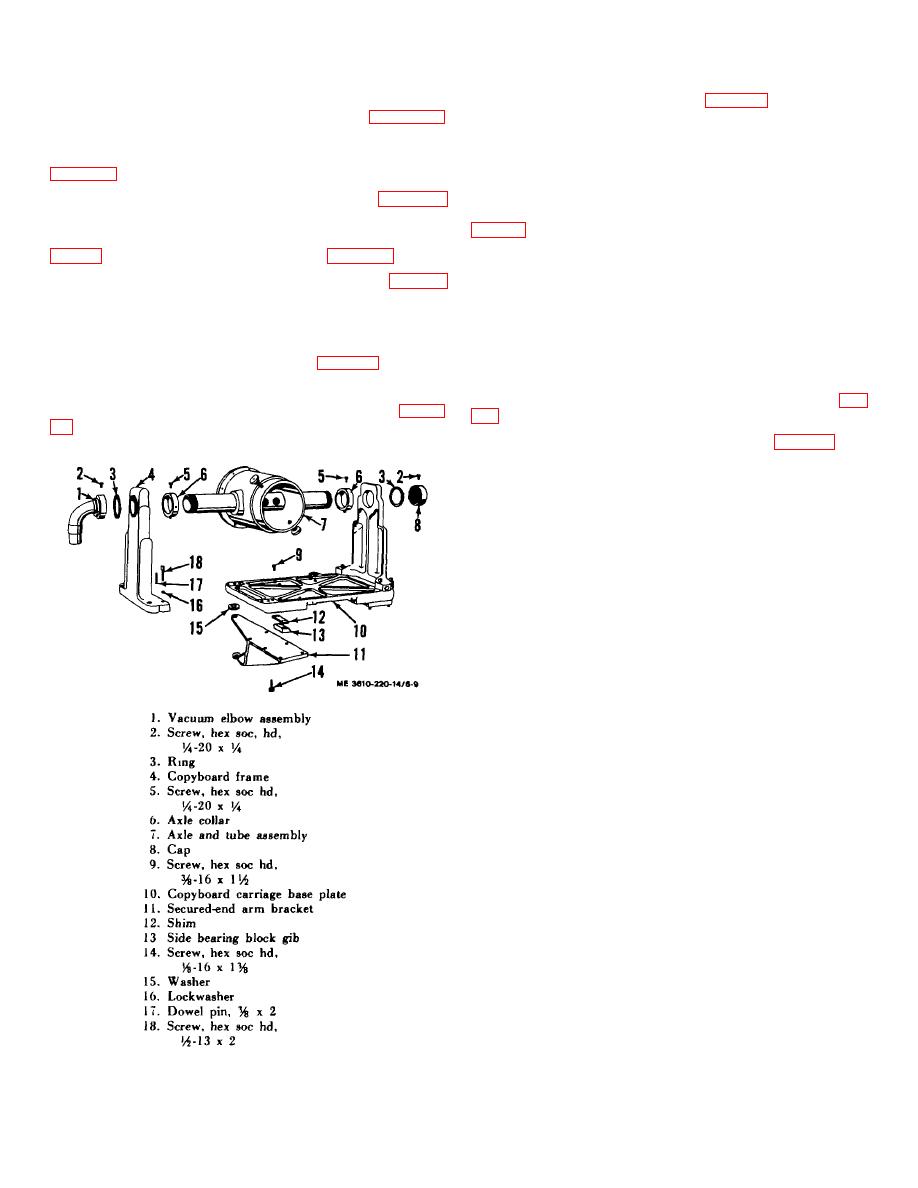
(1) Remove screw (2, fig. 6-9) and unscrew
vacuum elbow assembly (1) from thread axle of the axle and
(1) Remove the copyboard assembly (para 4-52.
tube assembly (7). Lift off ring (3).
by.
(2) Remove six screws (14), securing secured-end
(2) Remove the transparancy holder assembly
arm bracket (1 1) to the carriage base plate (10). Lift off the
para 4-49. b.).
bracket (11). Remove other bracket in similar manner.
(3)
Remove thecopyboard locking device para 4-53.
(3) Drive out from the bottom two dowel pins (17,
b.).
(4) Lift off arc lamps from free-end brackets (14,
lockwashers (16).
Slide off copyboard frame (4) while
supporting weight of axle and tube assembly (-1). Unscrew cap
(8), and remove ring (3) and axle and tube assembly.
(5) Release the cross brace assembly (5, fig. 6-8)
by removing two hinge pin nuts (6) and washers (7).
(4) Loosen four screws (5) and slide two axle
collars (6) from axle.
(6) Remove two screws (10) from each of the four
wiper guards (9). Lift off the four guards and oil felt wipers (11).
(5) Remove four screws, securing remaining
copyboard frame to carriage base plate (10); drive dowel pins
(7) Remove two screws (9, fig. 6-9), securing
out from the bottom and lift off frame.
carriage base plate (10) to each of the four side bearing block
gibe (13). Lift off copyboard carriage assembly. Remove gibe
(6) Disassemble the cross brace assembly (5. fig.
(13) and shims (12) from copyboard drive brackets 15, fig. 6-
6-8) as follows:
(a) Remove two screws (1, fig. 6-10), two
flatwashers (15), two setscrews (4), and nuts (3), securing roller
bracket (12) to cross brace channel (7).
Lift out roller
assembly.
(b) Remove and discard stop nut (11)
and carefully tap out shoulder screw (14). Lift out roller (13).
(c) Remove remaining roller assembly in
the same manner.
(d) Remove oiler (2) .
(e) Remove two screws (5), lockwashers
(8), flat washers (9 (and nuts (10 (securing switch bracket (6).
Figure 6-9. Copyboard carriage assembly, exploded
view.
6-9
