
controls the flow of suction to the transparency holder housing
by opening and closing the housing port by a manually operated
diverter knob (13).
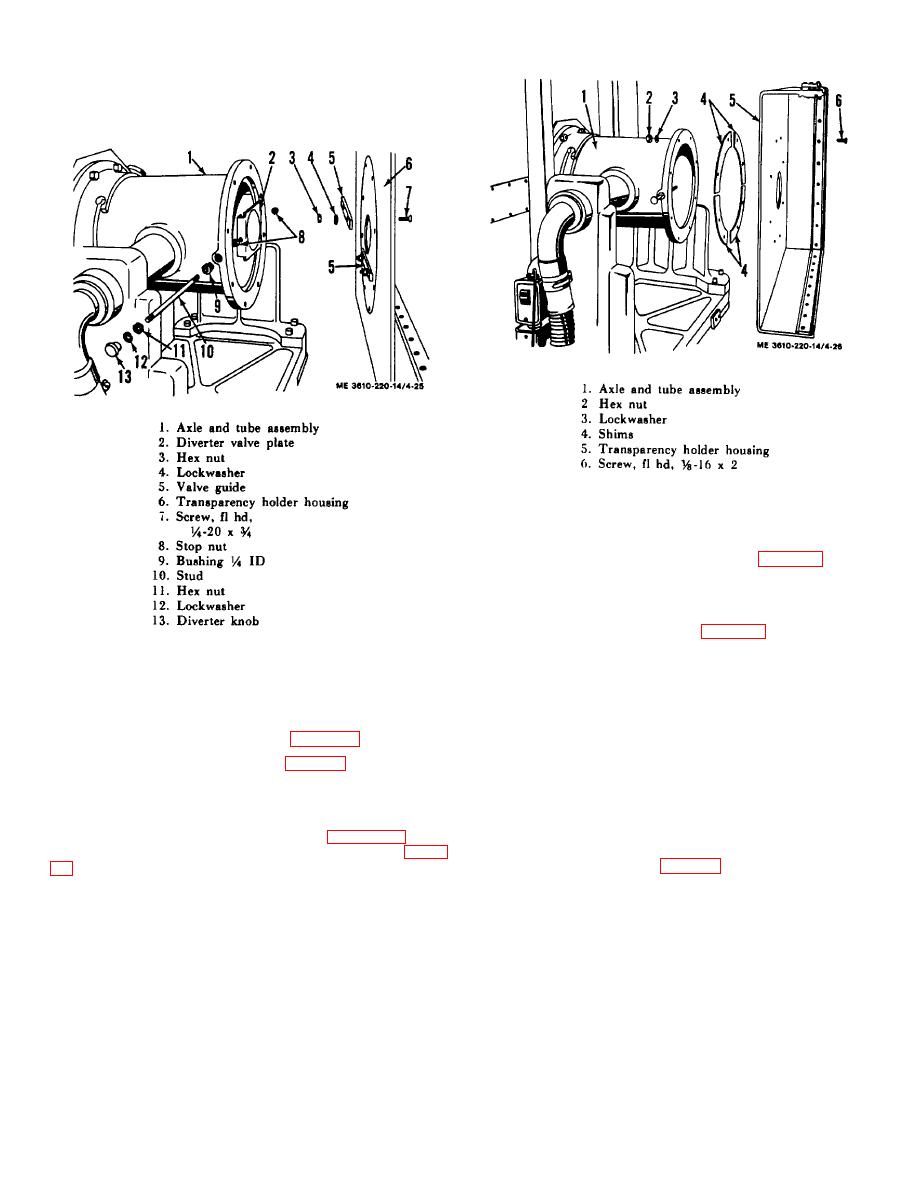
Figure 4-26. Transparency holder housing, exploded
view.
(4) Slide diverter valve plate (2, fig. 4-25) out of
valve guides (5). Remove four nuts (3), lockwashers (4), and
screws (7), securing two valve guides to transparency holder
housing (6). Lift off valve guides.
(5) Remove stop nut (8, fig. 4-25) from stud (10)
and slide out stud. Loosen nut (11) and unscrew knob (13),
Figure 4-25. Diverter valve plate assembly, exploded
lock washer (12), and nut (11) from stud. Unscrew bushing (9)
view.
from flange of axle and tube assembly (1).
b. Removal and Disassembly.
c. Cleaning and Inspection. Clean the transparency
holder housing and diverter valve parts with a cleaning solvent,
(1) Remove the light box assembly and diffusers
being certain to reach threaded areas. Dry parts thoroughly
from the transparency holder housing (para. 4-47. b.).
with a clean cloth. Inspect threaded parts for stripped or
(2) Pull diverter knob (13, fig. 4-25) as far out as it
damaged condition.
Inspect valve plate for cracks and
will come. Working through port of transparency holder
distortion. Examine valve guides for worn and corroded
housing (6), reach behind diverter valve plate (2) and unscrew
surfaces. Replace all defective parts.
stop nut (8) which secures diverter valve plate to stud (10).
d. Reassembly and Installation.
(3) Remove eight nuts (2, fig. 4-26) and
lockwashers (3) securing transparency holder housing (5, fig. 4-
(1) Screw nut ( 11, fig. 4-25) on stud (10) and slide
on lockwasher (12). Screw diverter knob (13) on same end of
four shims (4). Remove eight screws (6). Mark shim position
stud, and tighten nut and lockwasher against diverter knob.
to facilitate assembly.
Screw bushing (9)
4-28
