
b. Place a sharply marked transpnrency on the projection stage, and
move the projector to the left or right until the image is centered
laterally on the screen. Turn the focusing knob until the image on
the screen is in focus, and then turn the elevating knob on the back of
the projection head until the image is centered vertically on the screen.
Now turn the focusing knob again until the image is brought into
shnrp focus.
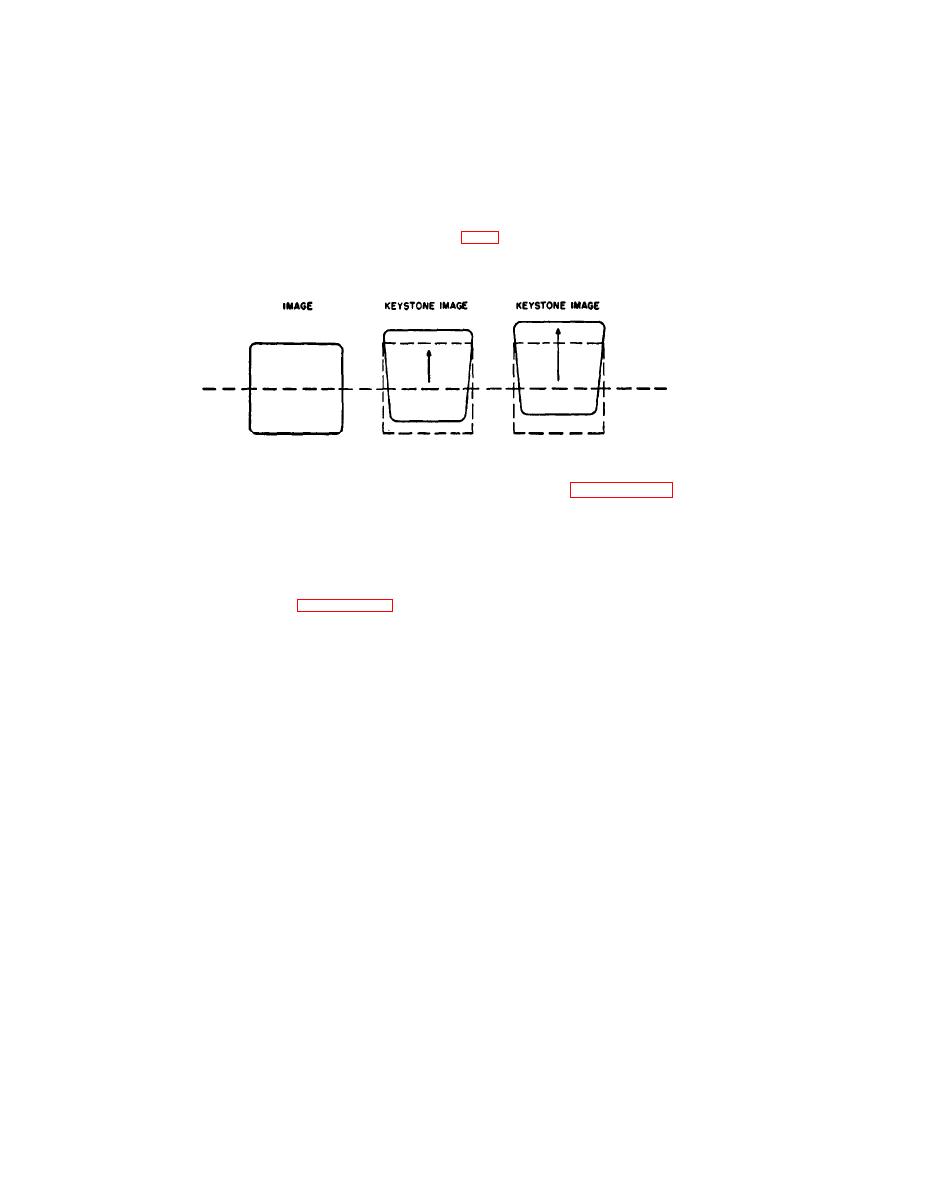
Note. As the image is raised above a certain postion on the screen, the picture
becomes wider at the top than at the bottom (fig. 9). This distortion (key-
stoning) is not ordinarily objectionable, but it may be corrected by using a screen
than can be tilted forward at the top or by raising the end of the projector
nearest the screen.
Figure 9. Keystone effect.
through 25.
d. When the presentation has been completed, throw the ON-OFF
switch to the OFF position.Replace the lens cap.
Section III. METHODS OF PRESENTATION
transparencies.
15. General
a. Planning Presentation.
Determine the prime objectives of the presentation.
(1)
Consider the objectives when determining what type of trans-
(2)
parencies are to be used and how they are to be used.
(3) Carefully plan and organize the entire presentation. In tim-
ing the presentation, allow time for audience participation,
if desired.
(4) Rehearse a sufficient number of times so that brief notes may
be used rather than verbatim commentary.
b. Types of Transparency.
Images of one or more colors on single transparent sheets.
(1)
(2) Composites made up of two or more transparencies mounted
as overlays.
18
TAGO 4738B
