
TM 11-7025-232-10
2-10. REMOVE/REPLACE CHARACTER BAND (CONT)
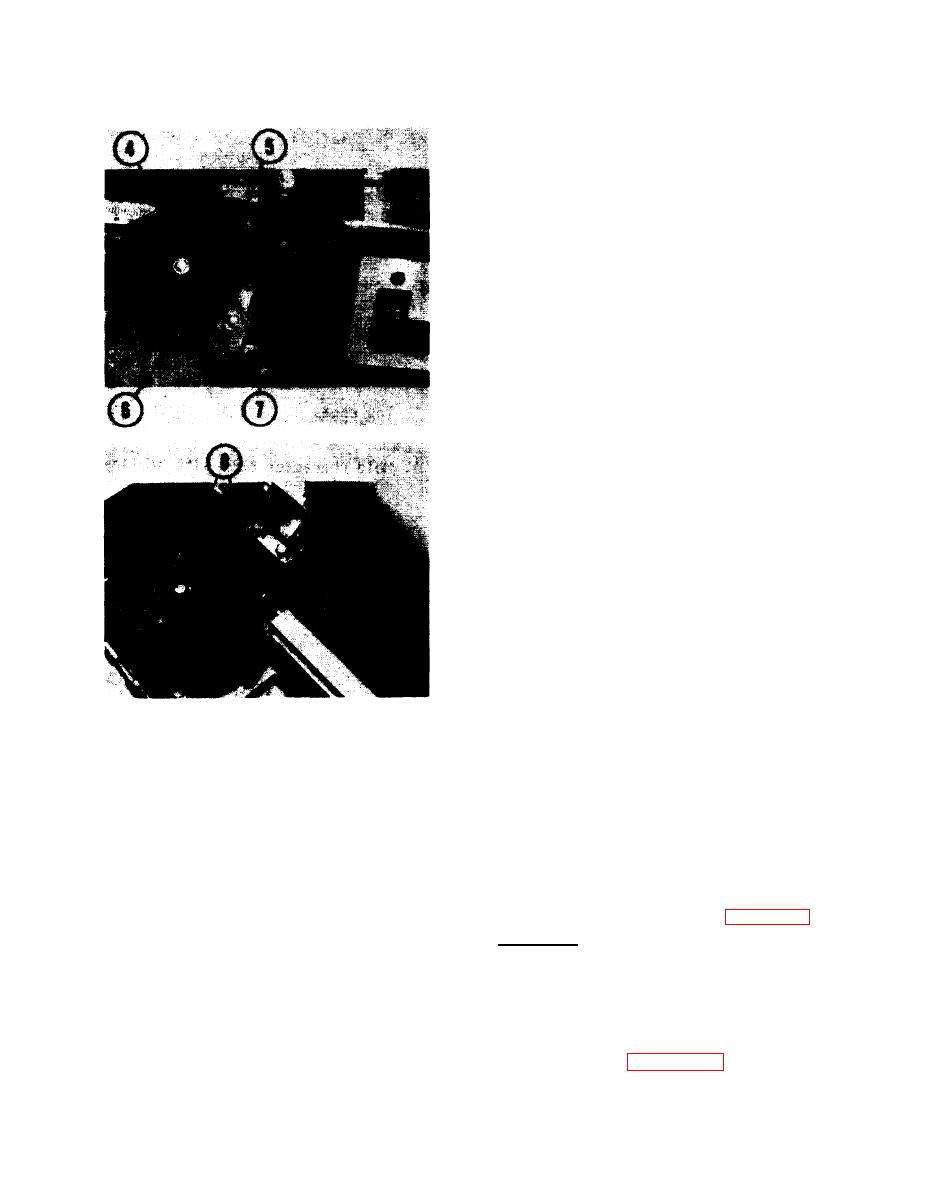
4. S l i d e band over right band pulley.
5. Position band between band
t r a n s d u c e r and pulley.
6. Move band down until bottom edge of
band rests on edge guide bearing
n e x t to each pulley.
Right edge guide bearing is
l o c a t e d in front of pulley
Left edge guide bearing is
l o c a t e d at rear of pulley
7. Move band release handle toward
f r o n t of printer, as shown.
8. W h i l e spinning either pulley in
direction shown, observe movement of
character band over both edge guide
bearings.
If character band touches, and
rides smoothly and evenly over
both edge guide bearings, go to
step 9
If character band does not touch
one or both edge guide bearings,
remove band and repeat steps 1
t h r u 7. If problem remains,
n o t i f y your supervisor that
m a i n t e n a n c e is required
If character band rides unevenly
or roughly over one or both edge
guide bearings, remove band and
repeat steps 1 thru 7. I f p r o -
b l e m remains, notify supervisor
t h a t maintenance is required
9. Close band cover.
10. R e p l a c e ribbon cartridge (para 2-9,
R e p l a c e , steps 2-14).
11. Lower hammer bank latch handle and
p r e s s into locked position.
12. P u s h ac plug into outlet.
13. R u n self test (para 2-15, steps
5-35).
2-24
