
assembly, first remove the two screws (fig. 10) that hold the
unit to the undercarriage. Lift the copy feeding unit out of
the undercarriage.
sheet metal screws and speed nuts that hold the end strip
opposite the crank handle of the copy feeding unit. Remove
the end strip and slide the conveyor belt off the unit.
(3) To replace the conveyor belt and copy feeding unit, reverse
the disassembly instructions given in subparagraphs (1) and
(2) above.
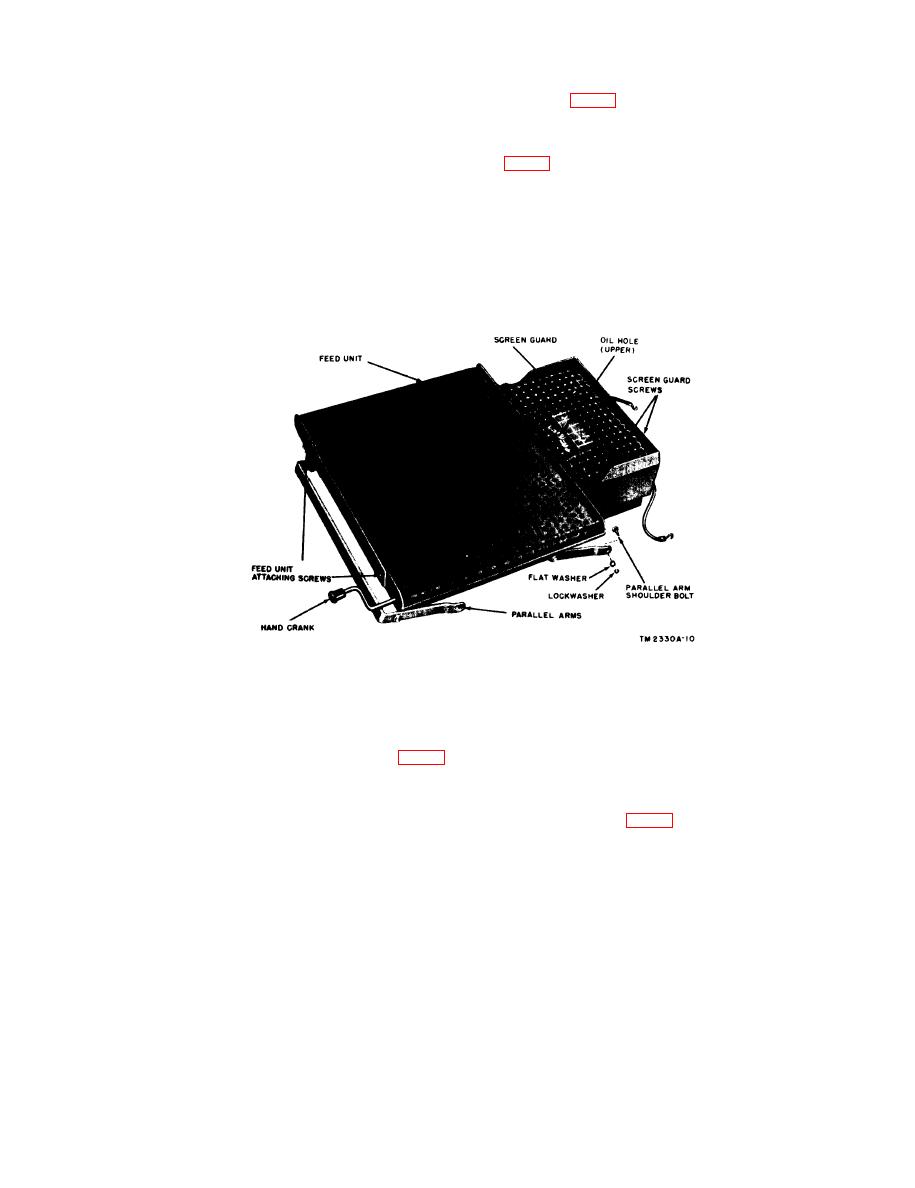
Figure 10. Undercarriage assembly.
b. Undercarriage.
(1) Turn the projector on its front and remove the two parallel
arm springs (fig. 15) which hold the undercarriage up in
position for projection. Disconnect the wires from the re-
ceptacle and the ON-OFF switch.
(2) Remove the four parallel arm shoulder bolts (fig. 10), flat
washers, and lock washers that hold the parallel arms to the
housing. Lift the undercarriage out of the unit.
(3) To replace the undercarriage reverse the disassembly instruc-
tions given in subparagraphs (1) and (2) above.
35
