
TM 11-7025-232-10
2-10. REMOVE/REPLACE CHARACTER BAND (CONT)
CAUTION
Do not bend character band smaller
than diameter of band pulleys.
9. Squeeze band together at center.
10. L i f t band off left band pulley.
L i f t band out of printer.
Replace
WARNING
Top edges of band are sharp. Avoid
contact.
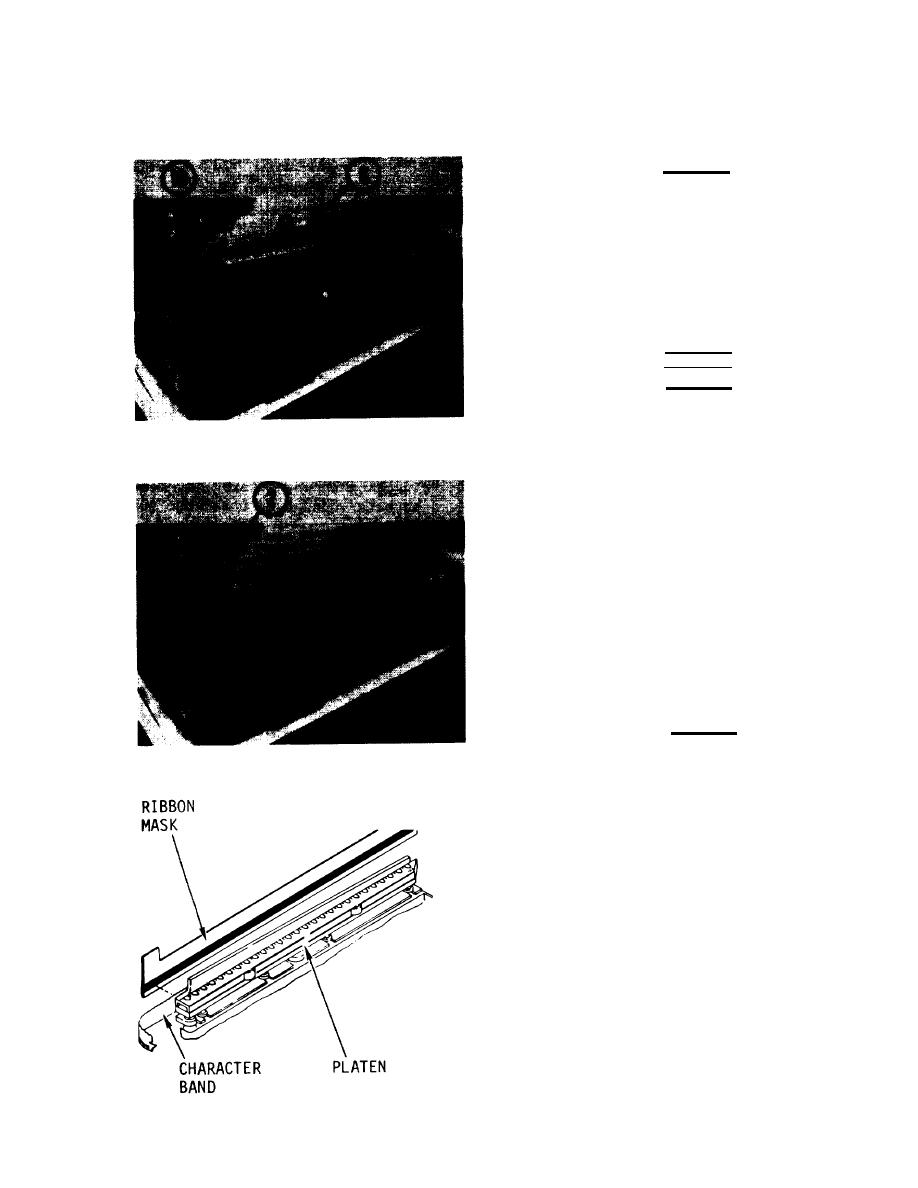
1. Hold character band with scalloped
edges facing up.
2. Place band around left band pulley.
CAUTION
Make sure band is placed between
r i b b o n mask and platen. Otherwise,
mask can be damaged.
3 . Carefully insert band between ribbon
mask and platen, as shown.
2-23

