
TM 11-6720-248-12
for a subject with dark complexion, and to f/8 for a
subject with light complexion.
h. Photograph a subject as follows:
(1) Rotate the camera housing through an arc
of 180 clockwise. This rotation positions the film so that
one-half of the frame of film will be exposed and
releases the double exposure prevention mechanism so
that the shutter will operate.
(2) Insert the appropriate letters and numerals
into the grooves of a titleboard and secure the titleboard
holder assembly (fig. 1-3 and para 2-4c).
(3) Position the subject. Adjust the camera
set height as follows:
(a) Loosen the telescope clamp screw
on the tripod.
(b) Adjust the inner tube so that the end
of the titleboard holder assembly is against the subject's
chest and the top of the titleboard is approximately 4
inches below the subject's chin.
(c) Tighten the telescope clamp screw.
(4) Have the subject look at the stereoscopic
attachment; press the release button.
(5) If another pair of photographs of the same
subject is required, repeat the procedures outlined in (1)
and (4) above after the neon indicator of the strobe
assemblies lights. If a pair of photographs of another
subject is required, repeat the procedures outlined in (1)
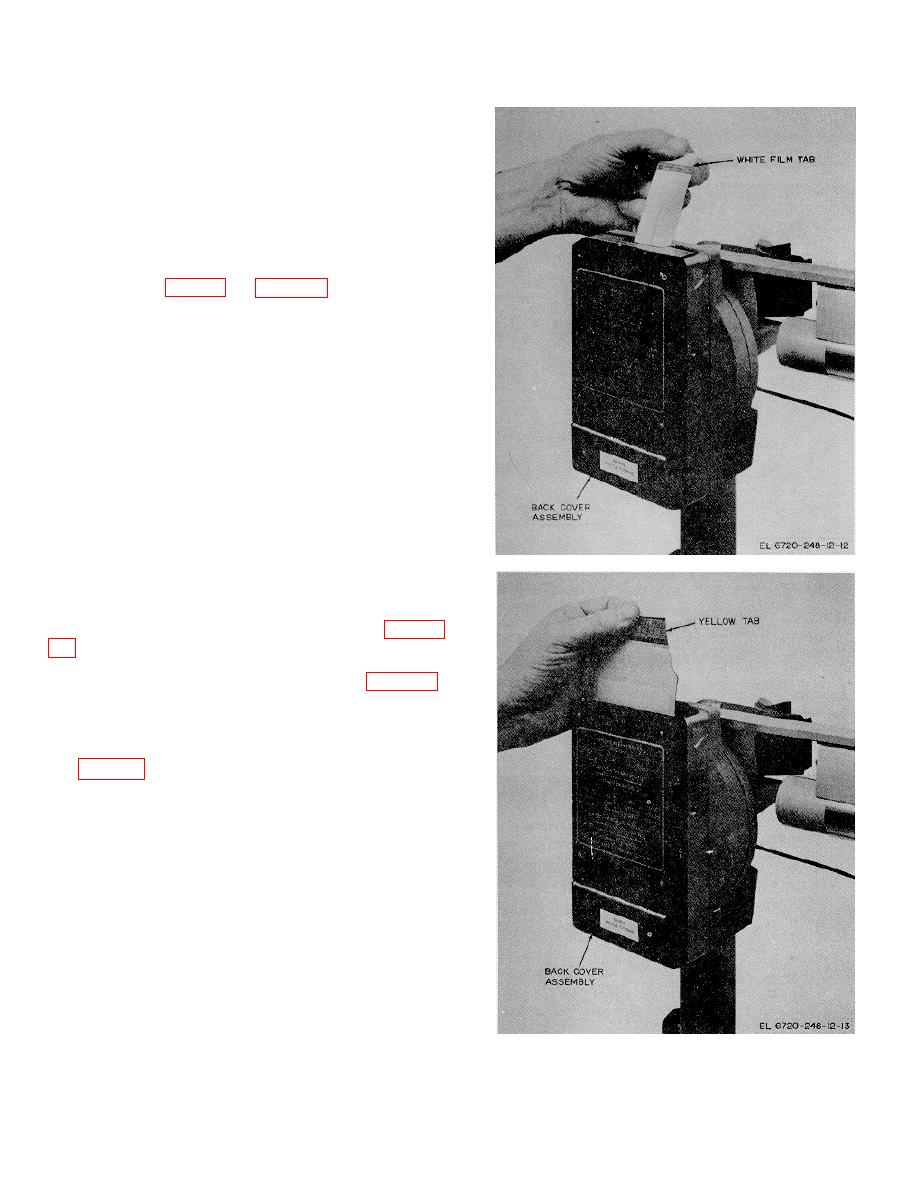
Figure 3-7. Removing white film tab.
through (4) above with the new subject.
i. After two pairs of photographs have been made
on the same frame of film, process the print as follows:
(1) Grasp the protruding white film tab (fig. 3-
out of the camera to expose the yellow tab.
(2) Grasp the protruding yellow tab (fig. 3-8)
and pull the film, with a straight, continuous motion, out
of the camera.
(3) After a period of 10 seconds, grasp the
corner of the print and carefully remove the print from the
film (fig. 3-9). Handle the print only by its edges.
NOTE
Do not allow the print-coating
applicator to pick up dust in the area;
the printcoating will transfer dust to
the finished print.
(4) Remove the print-coating applicator from
its container.
(5) Hold the print by its edge and coat the
Figure 3-8. Removing film to stars print processing.
3-5

